Best Countries for Digital Nomads in 2026 (Based on Real Constraints, Not Instagram)
Remote work didn’t just “change where we work.” It changed what a life plan looks like. In 2026,
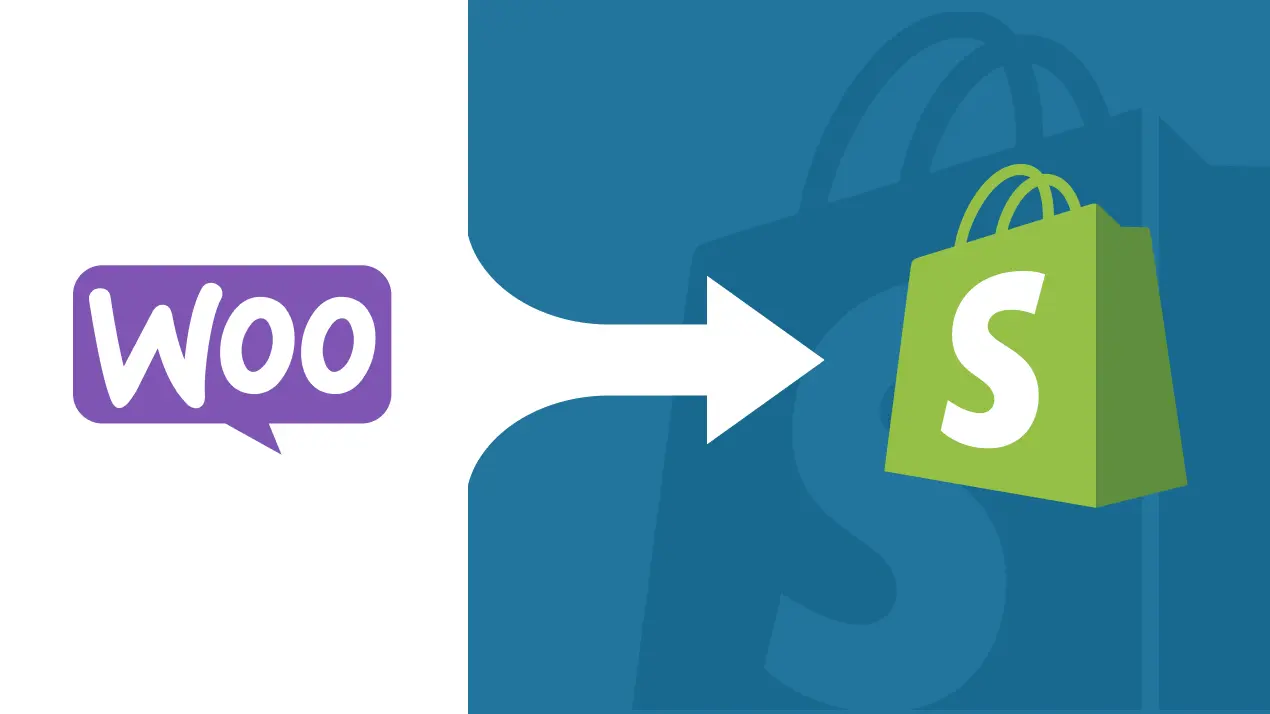
So, your online store, built with the trusty WooCommerce, has been your digital workhorse. It’s served you well, gotten you off the ground, and helped you carve out your niche in the bustling world of e-commerce. But lately, perhaps you’ve felt the growing pains. The once-simple setup now feels like a tangle of plugins, updates are a source of anxiety, and you’re spending more time troubleshooting than strategizing your next big sales campaign. If this sounds familiar, you’re not alone. Many ambitious businesses find themselves at this crossroads, looking to move their WooCommerce store to Shopify for a more streamlined, scalable, and stress-free future.
Migrating an entire e-commerce platform can sound like a monumental task, akin to relocating your entire brick-and-mortar operation. But what if I told you it doesn’t have to be an overwhelming ordeal? This comprehensive guide is designed to demystify the WooCommerce to Shopify migration process, breaking it down into five clear, actionable steps. We’ll walk you through everything from initial planning and data export to designing your new storefront, rigorous testing, and a successful launch. By the end, you’ll not only understand how to make the switch but also why it could be the best move for your growing brand, armed with the confidence to transition smoothly and efficiently.
Why Migrate from WooCommerce to Shopify?
Before diving into the “how,” let’s briefly touch upon the “why.” Both WooCommerce and Shopify are powerhouses in the e-commerce world, but they cater to slightly different needs and philosophies.
WooCommerce, an open-source plugin for WordPress, offers incredible flexibility and customization. It’s a fantastic starting point, especially if you’re already familiar with WordPress. You have control over every aspect, from hosting to design to functionality, largely driven by a vast ecosystem of themes and plugins.
Shopify, on the other hand, is a fully hosted, all-in-one SaaS (Software as a Service) platform. It prioritizes ease of use, reliability, and integrated features, allowing merchants to focus on selling rather than technical maintenance.
For many businesses, the very flexibility that drew them to WooCommerce eventually becomes a source of friction. Common pain points include:
Plugin Overload: Remember when you just needed a payment gateway and a shipping calculator? Now, your WooCommerce backend might be juggling dozens of plugins for SEO, marketing automation, customer reviews, subscriptions, advanced shipping rules, and more. Each plugin adds a layer of complexity, potential for conflicts, security vulnerabilities, and the constant need for updates (which can sometimes break things!). It’s like a Jenga tower – one wrong move and things can get wobbly.
Performance Issues: As your product catalog expands, customer base grows, and traffic surges, a WooCommerce store can start to feel sluggish if not meticulously optimized. This often requires technical know-how in areas like caching, database optimization, and image compression, or costly expert help. Slow load times can kill conversions and frustrate customers.
Scalability Limitations (or Hurdles): While WooCommerce can scale to handle large volumes, it often demands significant investment in robust hosting infrastructure (like dedicated servers or managed WordPress hosting), continuous performance monitoring, and developer resources to maintain stability. Scaling isn’t an out-of-the-box feature; it’s an ongoing project.
Maintenance Burden & Security Responsibility: Being self-hosted means you’re the captain of your ship, which also means you’re responsible for everything from SSL certificates (though many hosts offer them) to fending off security threats and diligently applying updates for WordPress core, WooCommerce itself, themes, and all those plugins. This can be time-consuming and, frankly, a bit nerve-wracking.
This is where Shopify often shines and why many businesses make the switch from WooCommerce to Shopify:
Ease of Use: Shopify’s interface is renowned for its intuitiveness. Handling products, orders, and customer details is simple and user-friendly, even for beginners without technical experience.The learning curve is generally much gentler.
Hosted Infrastructure & Reliability: Shopify takes care of all the hosting, server maintenance, security (including PCI compliance for payments), and software updates. You don’t have to worry about your site crashing during a sales peak because your server couldn’t handle the load. Their infrastructure is built for e-commerce at scale.
Dedicated Support: When you hit a snag, Shopify offers 24/7 support via phone, email, and live chat. This is a significant advantage over the often community-reliant support model of open-source platforms.
Reliable Scalability: Whether you’re getting your first hundred orders or experiencing viral growth, Shopify’s platform is designed to scale seamlessly.Shopify Plus provides advanced, enterprise-level features tailored for businesses with high sales volume.
Built-in Features & Curated App Store: Many essential e-commerce features are built into Shopify. While there’s an extensive app store for specialized functionalities, the core offering is robust, and apps are generally vetted for quality and compatibility.
If you’re nodding along, recognizing these WooCommerce pain points and seeing the appeal of Shopify’s benefits, then you’re ready to explore the migration process.
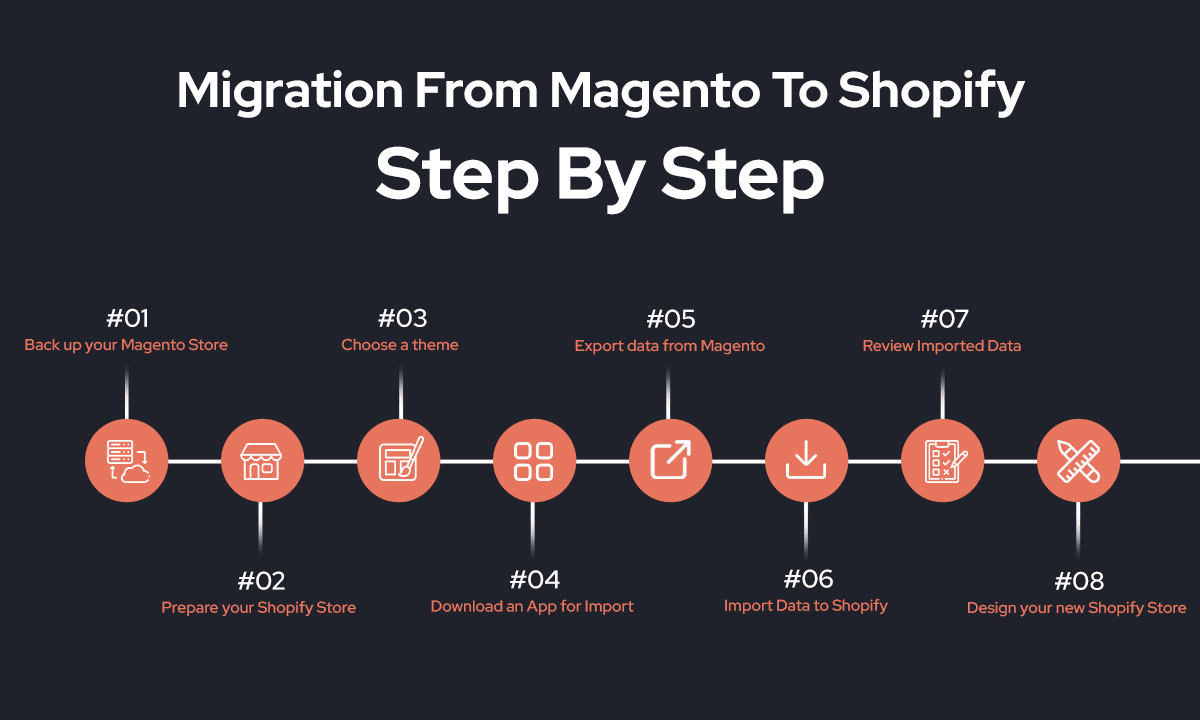
Step-by-Step Migration Guide: Your Journey from WooCommerce to Shopify
Let’s break down this seemingly complex undertaking into five manageable steps. Think of this as your roadmap to a new, improved online store.
Step 1: Preparation & Planning – The Blueprint for Success
Just like building a house, a successful migration starts with a solid plan. Rushing this stage is a recipe for headaches later.
Inventory All Your Data: Before you pack your digital boxes, you need to know exactly what you’re moving. Create a detailed inventory of:
Products: Names, SKUs, descriptions, high-resolution images (and their URLs/files), variants (size, color, etc.), prices, categories/tags, inventory levels, weights, and any custom fields or meta descriptions.
Customer details include names, contact information, shipping and billing addresses, and their purchase history. (Note: Customer passwords cannot be migrated due to encryption; we’ll address this later.)
Orders: Order IDs, customer information, product details, quantities, prices, payment status, fulfillment status, shipping details, taxes, and any notes.
Content: Blog posts, static pages (About Us, Contact Us, FAQ, Shipping Policy, Refund Policy, Privacy Policy), and all associated SEO metadata (titles, descriptions).
Plugins & Functionalities: This is crucial. List every WooCommerce plugin you currently use and its specific function. Then, research how you’ll replicate that functionality in Shopify. Is it a native Shopify feature? Will you need an app from the Shopify App Store? Imagine Sarah, who runs an online boutique. She meticulously listed her 15 WooCommerce plugins, from her pop-up builder to her loyalty program, and then researched Shopify equivalents. This saved her from feature-shock post-migration.
Select the Most Suitable Shopify Plan: Shopify provides multiple pricing tiers to meet different business needs.Consider your current business size, sales volume, feature requirements, and growth projections:
Basic Shopify: Ideal for new businesses or those with modest sales, offering core e-commerce features.
Shopify: The most popular plan, suited for growing businesses that need more staff accounts, better reporting, and lower transaction fees.
Advanced Shopify: For larger businesses needing advanced reporting, third-party calculated shipping rates, and even lower transaction fees.
Built for high-growth enterprises, Shopify Plus offers robust customization options, premium support, and powerful API access tailored for businesses with large sales volumes.Most users begin with a trial to explore the platform’s features.
Shopify Plus is designed for large-scale businesses and high-volume sellers who need advanced customization, priority support, and enhanced API capabilities. Most users begin with a trial to explore the platform’s features.
Choose a Shopify Theme: Your store’s design is its digital storefront.
Shopify offers a dedicated Theme Store featuring both free and paid designs. Choose a theme that reflects your brand’s style and suits your industry. Prioritize mobile optimization, fast performance, and a smooth browsing experience for your customers.
You might find a theme similar to your old WooCommerce design, or this could be the perfect opportunity for a fresh, modern look. Many businesses use the migration as a chance to rebrand or improve their site’s visual appeal.
Set Realistic Timelines & Create a Migration Checklist:
Migrating from WooCommerce to Shopify requires time and strategy—it’s not something that can be done in a single day.
Depending on the complexity of your store (number of products, orders, customizations), it could take anywhere from a few days to several weeks.
Divide the whole migration process into clear, actionable steps using a checklist to stay organized.Assign responsibilities if you have a team, and set realistic deadlines for each.
Your checklist might include: WooCommerce data backup, product data export, customer data export, Shopify account setup, theme installation & customization, data import to Shopify, app installation & configuration, payment gateway setup, shipping configuration, redirect setup, thorough testing, domain change, post-launch monitoring.
Step 2: Export Data from WooCommerce – Getting Your Goods Out
With your plan in place, it’s time to extract your valuable data from your WooCommerce store. One of the standard approaches is to transfer data by exporting it as CSV (Comma-Separated Values) files.
How to Export:
Product Data:
WooCommerce has a built-in product exporter (Navigate to Products > All Products in your WordPress admin, then click the “Export” button). This will generate a CSV file.
For more complex product setups with many custom fields or variations, you might consider plugins like “Product Import Export for WooCommerce” by WebToffee, which offer more granular control over exported fields.
Customer Details:
Customer data can be exported straight from WooCommerce by navigating to WooCommerce > Customers and selecting the download option.
Alternatively, plugins like “Import Export WordPress Users and WooCommerce Customers” by WebToffee can provide more comprehensive options.
Order History:
Exporting orders from WooCommerce typically requires a plugin. Options like “Advanced Order Export For WooCommerce” or “Order Export & Order Import for WooCommerce” by WebToffee are popular choices. Shopify’s own “Store Importer” app may also offer a direct connection to pull orders.
Content (Pages & Blog Posts):
WordPress has a built-in export tool for this. Go to Tools > Export. You can choose to export All content, Posts, or Pages. This will generate an XML file, which can then be imported into Shopify’s blog and pages section (though sometimes this requires an intermediary app or manual copying for formatting).
Limitations and How to Address Them:
Missing Fields/Custom Fields: The default WooCommerce CSV exporters might not capture all your custom fields or specific metadata. This is where specialized export plugins become invaluable. Always open your exported CSV files in a spreadsheet program (like Excel or Google Sheets) to verify that all necessary columns and data are present. If something is missing, you may need to adjust your export plugin settings or plan for manual data entry/adjustment later.
Customer Passwords: For security reasons, customer passwords cannot be exported. After migrating, your customers will need to create new passwords on your Shopify store. It’s crucial to communicate this clearly. Shopify has tools (like the bulk account inviter) to help you send out account activation emails.
Plugin-Specific Data: Data created and managed by certain WooCommerce plugins (e.g., loyalty points from a specific rewards plugin, or data from a custom booking system) might not be directly exportable in a Shopify-compatible format. You’ll need to investigate if the Shopify equivalent app has an import feature for this data, or if manual setup is required.
Image Paths: Ensure your product image URLs in the CSV are publicly accessible if you’re linking to them directly. Otherwise, you’ll need to upload images to Shopify separately.
Always, always back up your WooCommerce store (both files and database) before you begin any export process!
Step 3: Import Data into Shopify – Setting Up Your New Shop
Once you have your data neatly exported (mostly in CSV files), it’s time to populate your new Shopify store.
Methods for Importing:
Shopify’s Built-in Import Tools (Store Importer app): Shopify provides a “Store Importer” app (accessible via Apps in your Shopify admin) that can import products, customers, and sometimes orders directly using CSV files. They provide sample CSV templates, which are incredibly helpful for understanding the required format. Compare your exported WooCommerce CSVs to these templates and reformat if necessary.
Third-Party Migration Apps/Services: For more complex migrations or if you prefer a more automated process, several reputable services and apps can handle the heavy lifting:
LitExtension or Cart2Cart: These are popular automated migration services that connect to both your WooCommerce and Shopify stores and transfer data directly. They often offer different service packages based on the amount of data and support needed. They can handle products, customers, orders, blog posts, and other entities, and often take care of data mapping nuances.
Matrixify (formerly Excelify): This is a powerful Shopify app for bulk import, export, and updates using Excel or CSV files. It gives you granular control over data mapping, supports custom fields (metafields in Shopify), and is excellent for large, complex datasets or for ongoing bulk management tasks post-migration. John, who had over 10,000 products with intricate variants, found Matrixify indispensable for his move from WooCommerce to Shopify, as it allowed him to meticulously map every piece of data.
Tips for Mapping Fields Correctly:
This is where attention to detail pays off. The column headers in your CSV file must match (or be mapped to) Shopify’s expected field names. For instance, WooCommerce’s “Regular price” might need to map to Shopify’s “Variant Price.”
Pay special attention to product variants (Shopify handles these differently than WooCommerce), SKUs (ensure they are unique), image URLs, and customer address fields.
Shopify’s documentation and the help resources for any import tool you use will be your best friends here.
Verifying Imported Data:
Don’t try to import everything in one massive batch initially. Start with a small sample set of data (e.g., 10-20 products, a few customers, and a couple of orders if importing them) to test the process.
Once imported, thoroughly check:
Product details: Are images displaying correctly? Are descriptions formatted properly? Are prices, variants, and inventory levels accurate?
Customer details: Are names, email addresses, and shipping information correct?
Order history (if migrated): Are past order details accurate?
Potential Post-Import Fixes:
Product Variants: Ensure variants are correctly associated with parent products and that options (like size and color) are set up as Shopify expects.
Collections (Categories): WooCommerce product categories don’t always map perfectly to Shopify collections.You will probably have to manually set up your collections again within Shopify.This can be done manually or automated using product tags or types from your imported data.
Image Issues: If images are broken, double-check the URLs in your CSV or re-upload images.
Internal Links: Links within your product descriptions or blog posts that pointed to other pages on your WooCommerce site will now be broken. These will need to be updated to point to the new Shopify URLs (more on redirects later).
Step 4: Rebuild Site Design and Functionality – The Makeover
With your data in place, it’s time to bring your store to life by focusing on its look, feel, and functionality.
Customize Your Chosen Shopify Theme:
If you selected a theme back in Step 1, now you’ll install it (if you haven’t already) and dive into customization.
Shopify’s theme editor is generally user-friendly, allowing you to change colors, fonts, layouts, upload your logo, and configure homepage sections without needing to code.
Your goal is to create a professional, trustworthy, and brand-aligned storefront that offers an excellent user experience. This is also a great time to improve upon your old design. For instance, if your previous site wasn’t fully mobile-responsive, ensure your new Shopify theme looks fantastic on all devices.
Replicate Core Functionality with Shopify Apps:
Refer back to that list of WooCommerce plugins and their functions you made in Step 1. Now, find their Shopify counterparts.
The Shopify App Store is vast. Here are some common replacements:
Shopify comes equipped with strong built-in SEO tools, such as customizable title tags, meta descriptions, and an automatically generated sitemap.
For advanced control, apps like “Plug in SEO” or “SEO Manager” are popular.
Product Reviews: Shopify has a free “Product Reviews” app. For more advanced features like photo reviews or review syndication, consider Yotpo, Loox, or Stamped.io.
Email Marketing: Shopify has its own “Shopify Email” tool. Many also integrate with Klaviyo, Omnisend, or Mailchimp for more sophisticated email automation and segmentation.
Subscriptions: If you offered subscriptions on WooCommerce (e.g., with WooCommerce Subscriptions), popular Shopify apps include ReCharge, Bold Subscriptions, or Skio.
Custom Fields/Metafields: WooCommerce’s Advanced Custom Fields (ACF) functionality can be replicated using Shopify’s built-in Metafields.
Tools such as “Metafields Guru” or “Accentuate Custom Fields” help simplify the management of custom data fields.
Shipping Complexity: For complex shipping rules, apps like “Advanced Shipping Rules” or integrations with services like Shippo or Easyship can be invaluable.
Key Tip: Avoid the temptation to overload your store with apps.
Each app can add to your monthly costs and potentially affect site speed. Prioritize essential functionalities.
Configure Essential Store Settings:
Payment Gateways: Set up Shopify Payments (if available in your country, it offers competitive rates and seamless integration) or connect your preferred third-party payment providers (like Stripe, PayPal).
Taxes: Configure tax settings accurately based on your business location and the regions you sell to. Shopify Tax can help automate this.
Shipping: Define your shipping zones, rates (e.g., flat rates, weight-based, price-based, or carrier-calculated rates), and shipping methods.
Checkout: Shopify’s checkout is highly optimized for conversions and largely standardized, but you can customize its branding elements.
Set up or revise essential pages such as your Return Policy, Privacy Policy, Terms of Use, and Shipping Information.
Shopify provides templates you can adapt.
Notifications: Customize the email and SMS notifications sent to customers for order confirmations, shipping updates, etc.
Step 5: Final Testing, Launch & Post-Migration Setup – The Grand Opening
This is the final stretch! Thorough testing is crucial before fully transitioning your WooCommerce store to Shopify.
Test Every Aspect of Your New Shopify Store:
Full Checkout Process: Place several test orders. Use different payment methods (if you have multiple), test discount codes, and check the entire flow from adding to cart to the thank you page
Product Pages: Verify all product information, images, variant selections, and add-to-cart functionality.
User Accounts: If you’ve invited customers to create new accounts, test the registration and login process. Check if past order history (if migrated) is visible.
Navigation and Links: Click through every menu item, internal link, and call-to-action button. Check for broken links.
Mobile Responsiveness: Thoroughly test your store on various smartphones and tablets.
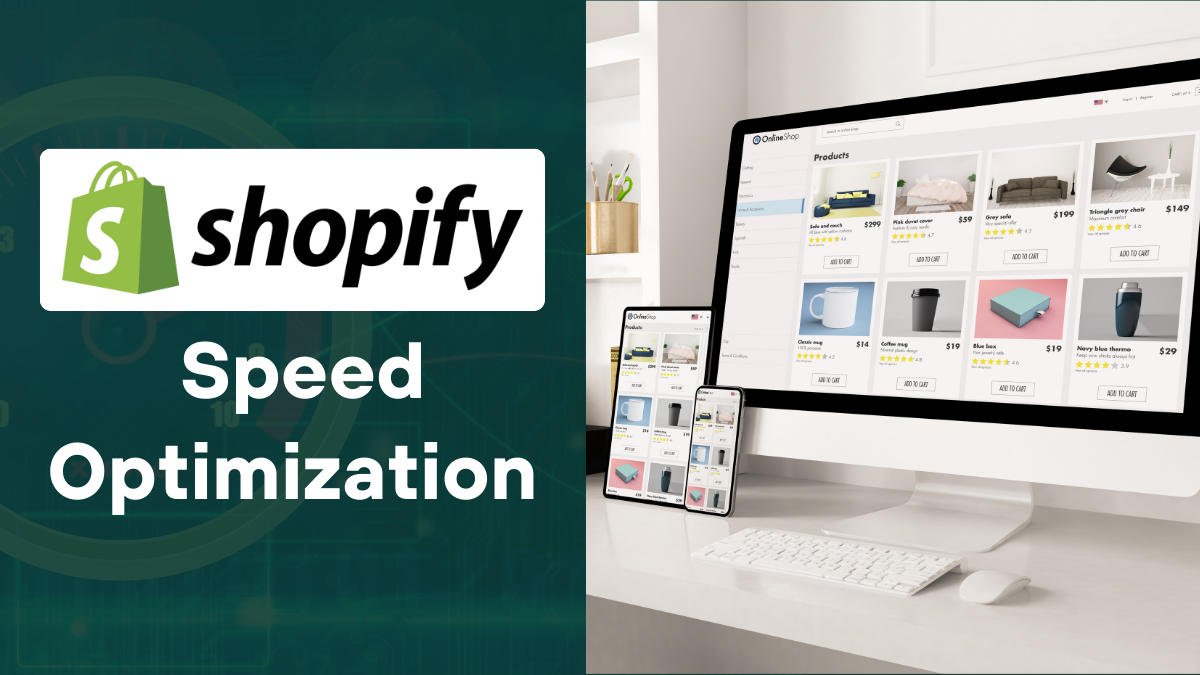
Site Speed: Use tools like Google PageSpeed Insights to check your new store’s performance.
App Functionality: Ensure all installed apps are working as expected (e.g., pop-ups, review widgets, chat).
Browser Compatibility: Check how your store looks and functions on different web browsers (Chrome, Safari, Firefox, Edge).
Set Up 301 Redirects – CRITICAL for SEO!
Switching from WooCommerce to Shopify often results in changes to your site’s URL format.For example, yourdomain.com/product/sample-product (WooCommerce) might become yourdomain.com/products/sample-product (Shopify).
If you don’t redirect old URLs to new ones, visitors clicking old links (from search engines, bookmarks, or external sites) will hit a “404 Not Found” error.This may lead to a poor user experience and have a detrimental effect on your website’s SEO.
You need to create 301 redirects (permanent redirects) for all your important pages: product pages, category pages (collections in Shopify), and blog posts.
Shopify includes a native URL redirection tool, accessible via Online Store > Navigation > URL Redirects.You can import CSV files of redirects, which is helpful for large sites. Apps like “Transportr” or “Easy Redirects” can also assist.
Analogy time: A 301 redirect is like setting up mail forwarding when you move to a new house. It ensures nothing gets lost.
Connect Analytics and Tracking Tools:
You can add your Google Analytics tracking ID in Shopify by going to Online Store > Preferences > Google Analytics.
Set up your Facebook Pixel and any other marketing pixels (e.g., Pinterest Tag, TikTok Pixel).
Upload your updated sitemap—commonly found at yourdomain.com/sitemap.xml—to Google Search Console and Bing Webmaster Tools to help search engines index your site effectively.
Point Your Domain to Shopify & Go Live!
Once testing is complete and redirects are in place, it’s time to update your domain’s DNS records to point to Shopify. This process is done through your domain registrar (e.g., GoDaddy, Namecheap). Shopify offers step-by-step guidance to help you complete this process easily.
Shopify offers step-by-step guidance to help you complete this process easily.
After DNS propagation (which can take a few hours, sometimes up to 48), your Shopify store will be live on your custom domain!
Announce Your Relaunch and Monitor:
Let your customers know about your shiny new store! Promote the update through email, social media platforms, and a prominent banner on your website.
Highlight any new features or improved shopping experience.
Closely monitor your store post-launch:
Keep an eye on sales and conversion rates.
Watch for any customer feedback or reported issues.
Review traffic trends in Google Analytics and look for crawl issues in Google Search Console.
Common Issues Faced During WooCommerce to Shopify Migration (and How to Resolve Them)
Even with thorough preparation, some hurdles may arise. Below are frequent issues you may face during the transition and practical ways to address them.
Incomplete Data Mapping:
Challenge: Custom fields, obscure product attributes, or even some SEO metadata (like image alt text) don’t transfer as expected.
Fix: Conducting a comprehensive review of your data prior to migration is essential.Use advanced import tools like Matrixify that offer flexible mapping. Be prepared for some manual cleanup or re-entry of certain data points post-import.
Plugin Incompatibility / Functionality Gaps:
Challenge: A specific WooCommerce plugin you relied on heavily doesn’t have a perfect one-to-one equivalent in the Shopify App Store, or the Shopify app works quite differently.
Solution: Extensive research into Shopify app alternatives during the planning phase (Step 1) is crucial. Be open to adapting your workflows. Sometimes, a combination of a Shopify native feature and a smaller app can achieve the desired outcome. For truly unique needs, custom app development is an option, but often not required for most stores.
SEO Disruption:
Issue: Even with careful planning, you might experience a short-term drop in search rankings or encounter more 404 errors than expected.
Solution: Meticulous 301 redirects are non-negotiable. Double-check them. Ensure all your key on-page SEO elements (titles, meta descriptions, H1 tags, image alt text) have been correctly migrated or recreated on Shopify. Regularly monitor Google Search Console for errors. A slight fluctuation can be normal, but proactive SEO management will minimize impact.
Design Limitations or Redesign Needs:
Challenge: Rebuilding your old WooCommerce design can be tricky, and the Shopify theme you choose might require significant tweaks to match your brand’s visual identity.
Solution: Be flexible. Instead of aiming for an exact pixel-perfect copy, focus on creating the best possible user experience on Shopify. The migration can be an excellent opportunity to modernize your design. Utilize Shopify’s theme editor, and if needed, consider hiring a Shopify design expert for specific tweaks.
Payment or Shipping Configuration Differences:
Challenge: Setting up complex shipping rules or integrating a niche payment gateway might work differently in Shopify’s ecosystem.
Solution: Thoroughly explore Shopify’s native payment and shipping options during Step 4. Test them extensively. The Shopify App Store often has solutions for more complex scenarios (e.g., advanced shipping rate calculators, specific payment gateway integrations). Feel free to reach out to Shopify’s support team for assistance whenever needed.
Customer Passwords (Revisited):
Challenge: Customers being confused or annoyed about needing to reset passwords.
Solution: Clear, proactive communication is key. Send out an email before the final switch explaining the migration and the need to create a new password for enhanced security on the new platform. Use Shopify’s bulk account inviter app to send activation emails smoothly. Frame it positively – a new, improved, and more secure shopping experience.
Expert Tips for a Smooth Migration
Having guided many businesses through this transition, here are some condensed expert tips to make your WooCommerce to Shopify migration as seamless as possible:
Use a Shopify development store (if you’re a partner) or your free trial period to import data, customize your theme, and test everything thoroughly. This is your sandbox.
Maintain Backups at Every Critical Stage:
Full backup of your WooCommerce site (database and files) before you start anything.
Save copies of all your exported CSV data files in a safe place.
While Shopify handles its own infrastructure backups, for critical data like products and customers, consider using an app like Matrixify to take your own Shopify store backups before major import operations.
Document Everything: Keep a migration log. Note down which WooCommerce plugins are being replaced by which Shopify apps, any custom configurations, data mapping decisions, and issues encountered (and their resolutions).
This documentation will serve as a crucial resource for future reference, resolving issues, or onboarding new team members.
Train Your Team: Shopify’s admin interface is different from WordPress/WooCommerce. If you have staff who manage orders, products, or customer service, ensure they receive adequate training on the new platform. Shopify provides a wide range of support resources, including detailed guides and instructional videos.Don’t Rush the Testing Phase: This is where you catch potential problems before your customers do. Be meticulous. Follow your test script.
Communicate Proactively with Customers: Inform them about the upcoming move, the benefits they can expect, and any actions they might need to take (like resetting passwords). Good communication can turn a potentially disruptive event into a positive one.
Schedule the Final Go-Live During Off-Peak Hours: This minimizes potential disruption to your customers if any immediate, unforeseen issues arise right after pointing your domain.
Conclusion: Your Next Chapter Awaits on Shopify
Moving your online store from WooCommerce to Shopify is undoubtedly a major transition.
It demands thoughtful preparation, precise implementation, and thorough testing throughout the process.However, the rewards – a more user-friendly platform, reduced technical overhead, robust scalability, and dedicated support – can be transformative for your business, freeing you up to focus on growth and innovation rather than constant site maintenance.
By following these five steps, anticipating common challenges, and leveraging expert tips, you can navigate the WooCommerce to Shopify migration process with confidence. It’s not just about changing platforms; it’s about setting your business up for its next chapter of success in the dynamic world of e-commerce. The journey might seem complex, but a smooth transition is entirely possible with the right approach.
Ready to make the move but feel you could use a helping hand? Migrating your entire business can be daunting. If you’re looking for expert guidance to ensure a seamless, error-free, and optimized WooCommerce to Shopify migration, our team of Shopify specialists is here to help. We’ll take care of the technical details, allowing you to concentrate on what matters most—growing your business.Reach out to us today for a tailored consultation and explore how Shopify can take your brand to the next level!
Share:
Remote work didn’t just “change where we work.” It changed what a life plan looks like. In 2026,
The 2026 reality: “zero-waste” isn’t a vibe anymore — it’s a workflow A few years ago, zero-waste content
It was 2:30 AM when Sarah finally admitted defeat. Her small jewelry business had a beautiful website, unique
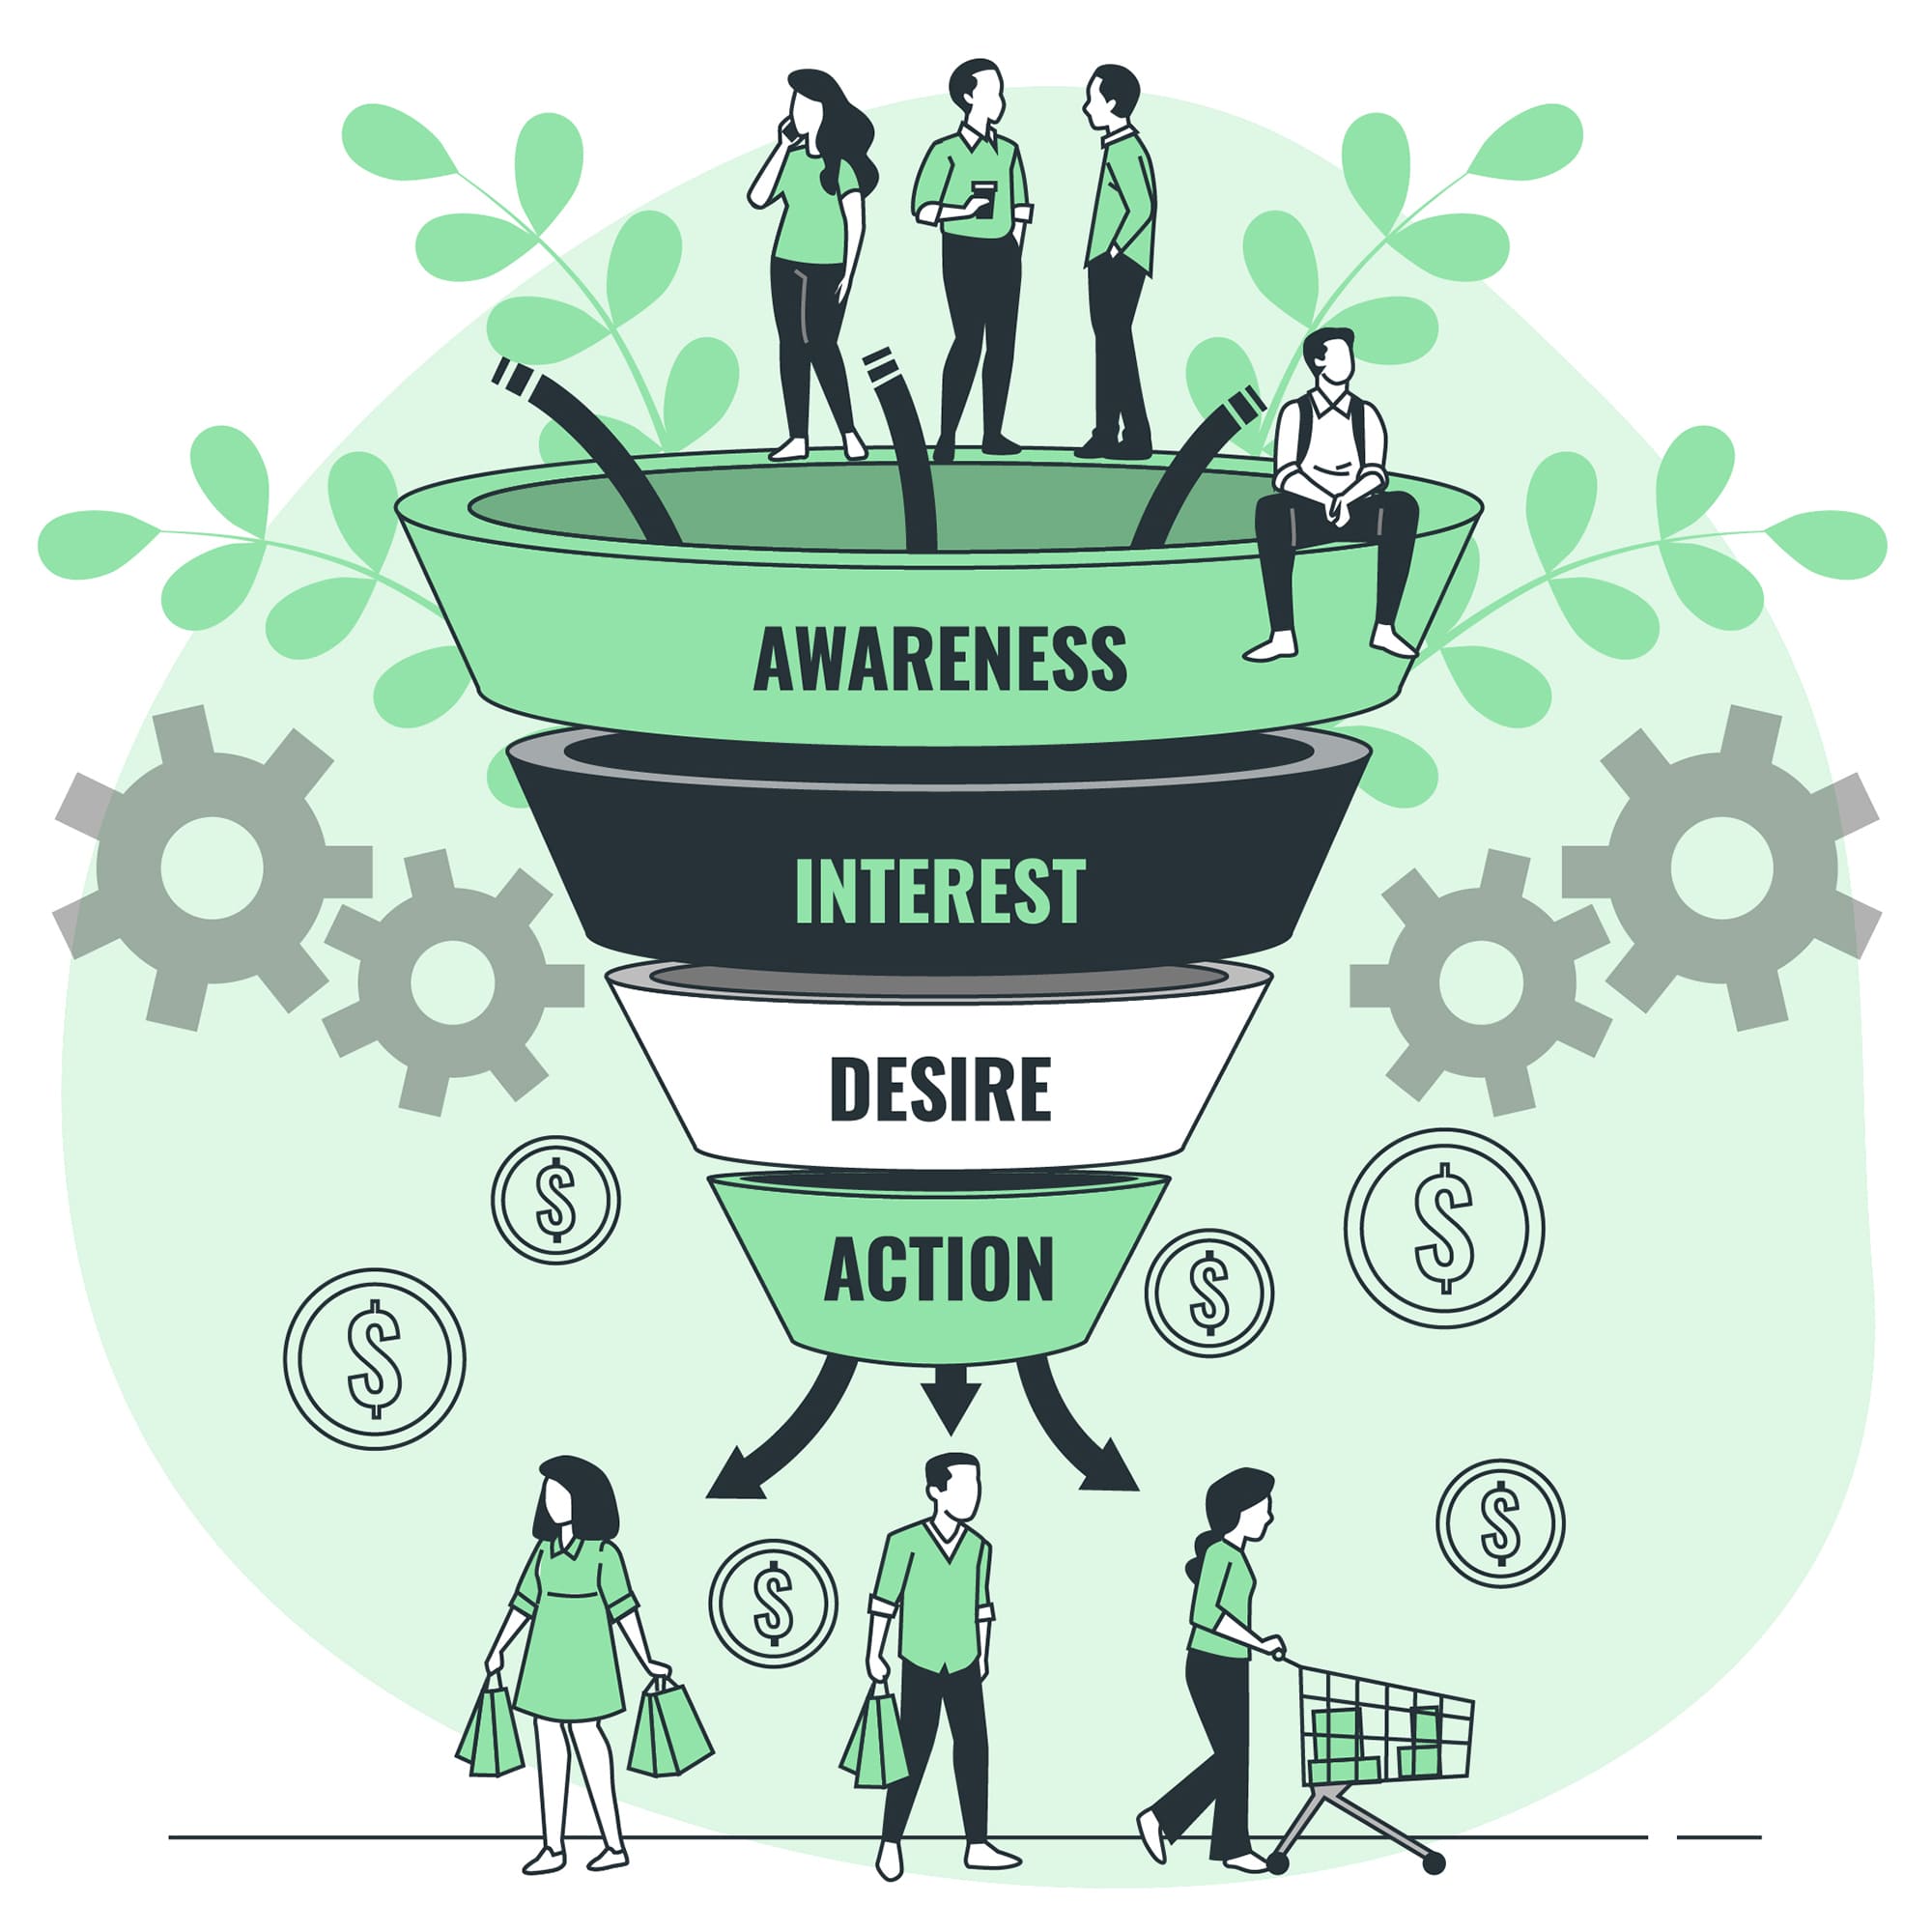
In the fast-paced world of e-commerce, adaptability is not just a strength—it’s a necessity. Over the past decade,
Imagine walking into a brick-and-mortar store, spotting a product you like, but struggling to find any helpful information.